"Ruby" the Riley Pages: 1 2 3 4 5 6 7 8 9 10 11(new) UPDATED: 22 August 2021 |
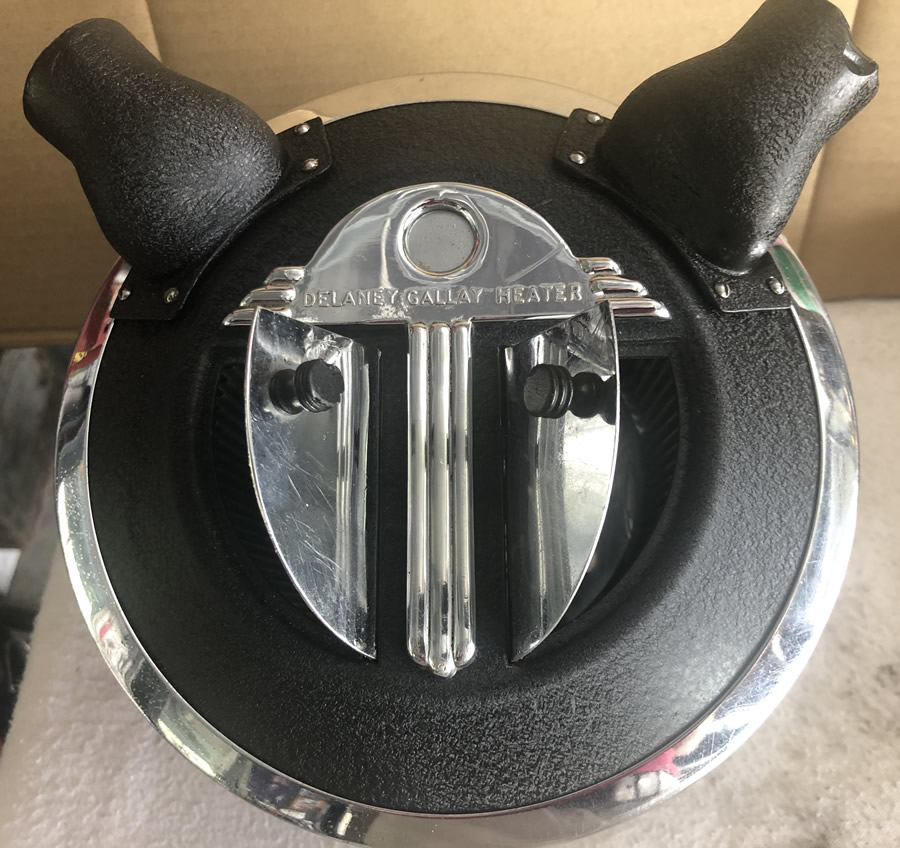
DELANEY GALLAY HEATER - REBUILD PART 2 |
|||
Before proceeding too far, I checked the integrity of the heater core by connecting a domestic water hose to one pipe and flushing some water through it. I gently blocked the other pipe to apply a bit of pressure but only to a guesstimate of 4lb as that is the radiator pressure. All OK. |
The inside was coated with a rust converter and the two cork insulation pads on either side (in good condition) were glued back in place where they had lifted. Grooves in them helped realign the core when installing it. |
||
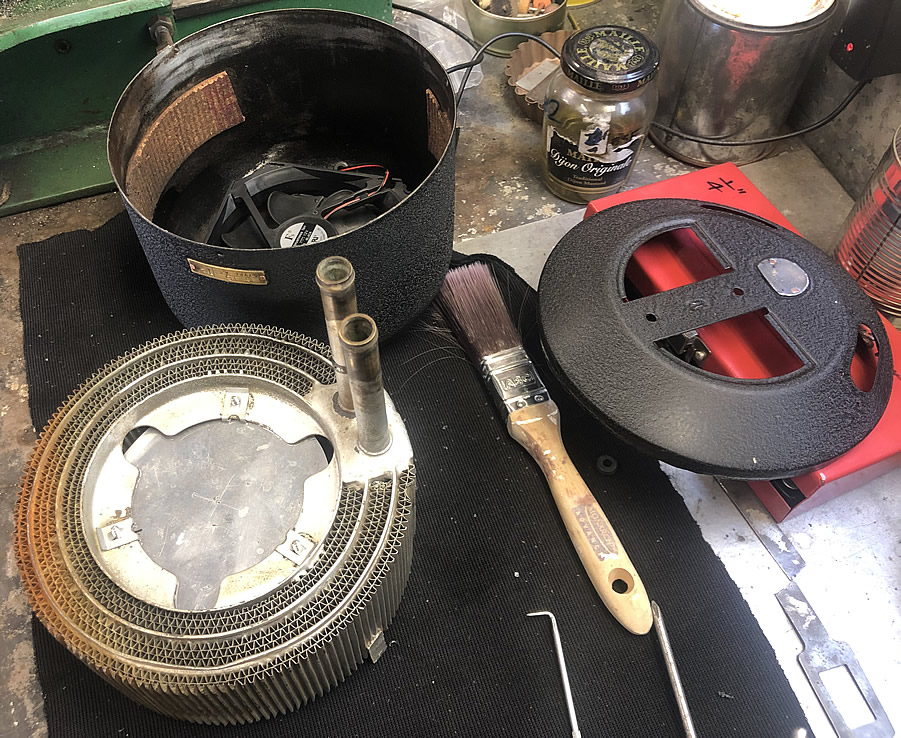
The wrinkle finish paint was VHT High Temperature "Wrinkle Plus" Good for up to 177°C and is made in the USA so was available in Australia and no doubt other countries.  |
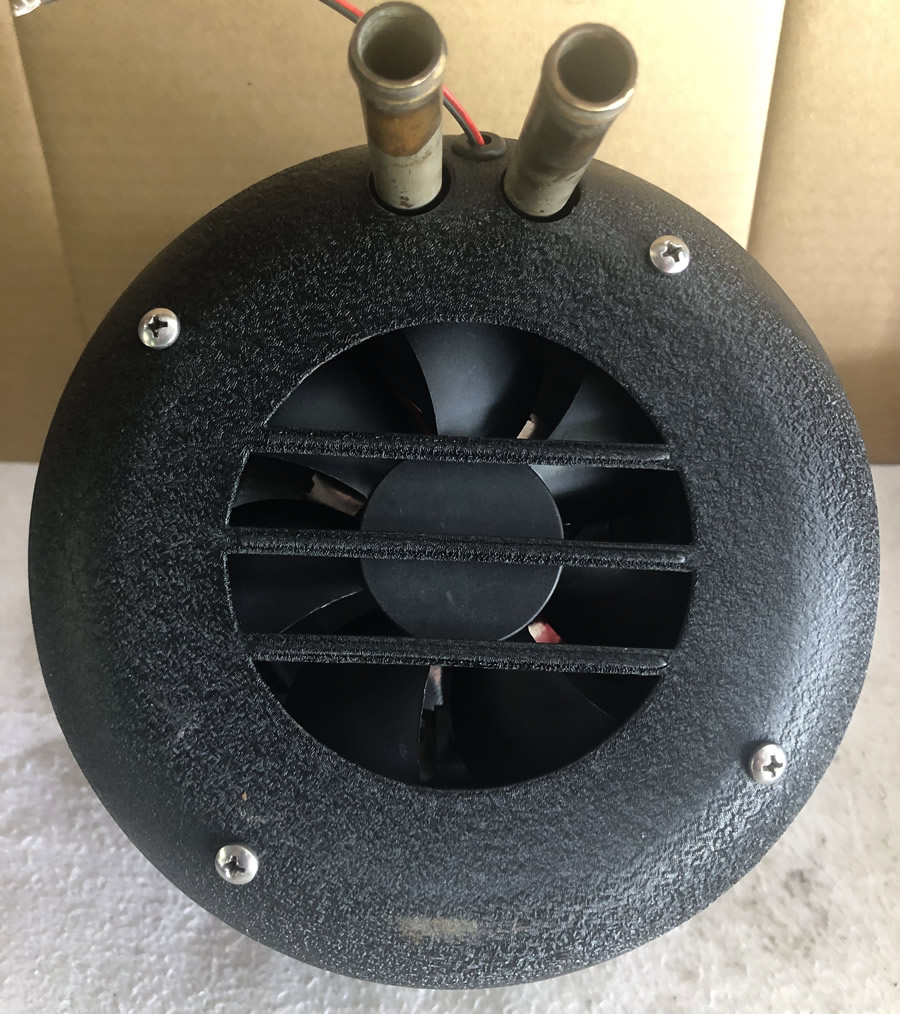
The Computer Fan was purchased on eBay and was described as: "DC 12V 2-Pin Brushless Cooling Cooler Centrifugal Blower Fan 120mm 120x25mm" (It was AU $15.56) They are characteristically very low power drain; quiet & efficient. The corners need to be cut back to allow the fan to sit close to the rear of the housing. 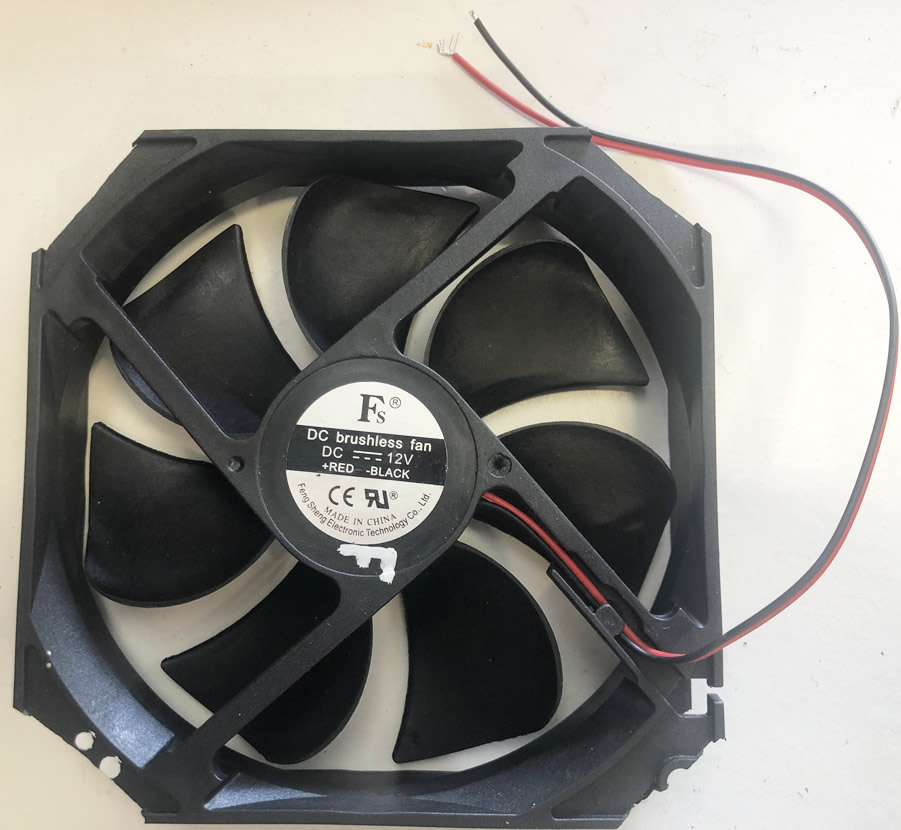 |
||
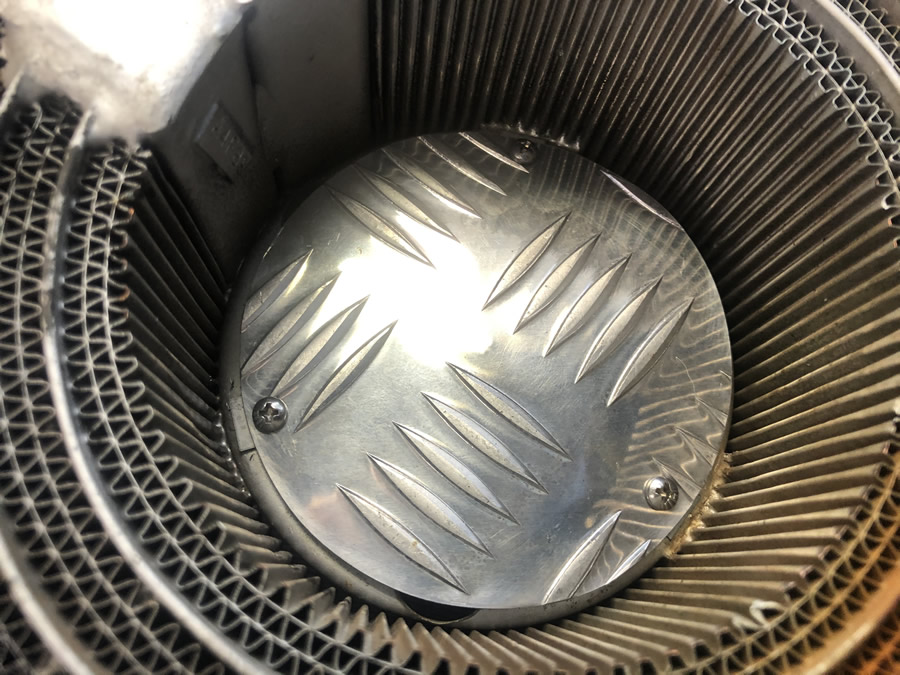
The fan went in first - the 2 white dots allowing me to to align it in the same place when fitting. The remains of the plastic flange needs to be wide enough to accept a 3/16" self tapper screw from behind. (so don't cut too much off the corners). I scribed a line around the fan and put a white pencil mark as shown in the Full Size photo 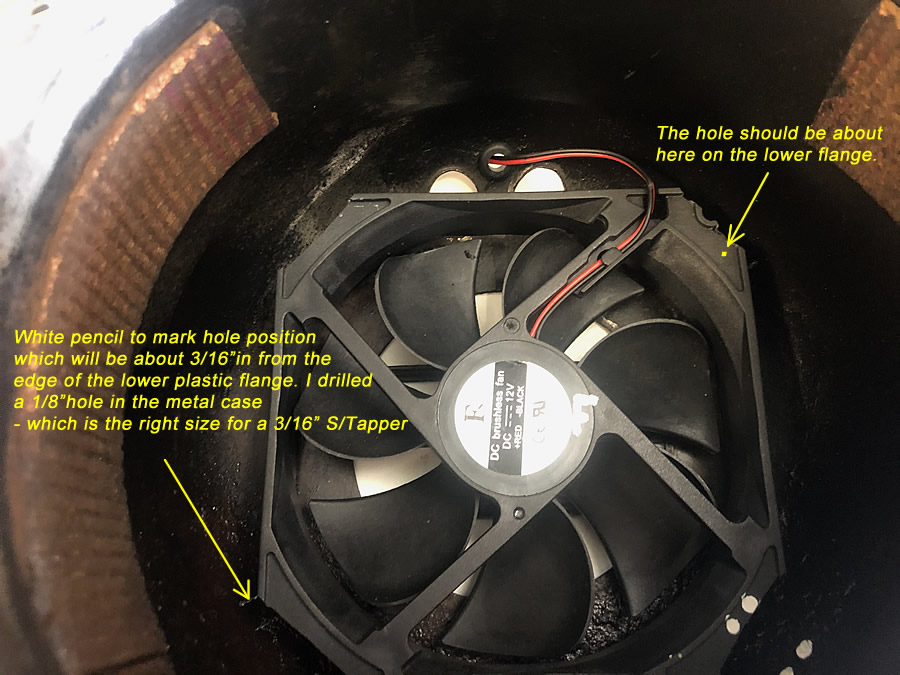 |
Starting to get close to reassembly but a lot more work is needed on the doors. I will dismantle the door flaps and renovate them. They work just fine. |
||
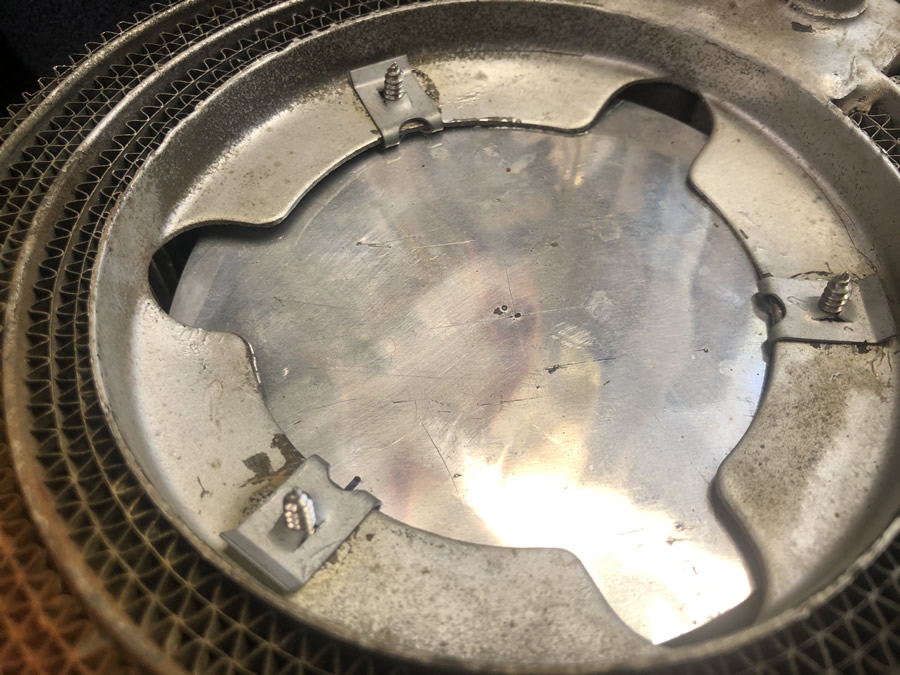
I found the baffle below to be unnecessary - so it was removed. |
|||
 |
 |
||
 |
 |
||
ONTO BRAKES & the REAR AXLE |
|||
 |
The start of the saga! It was clear from oil seepage that the rear axle seals needed replacing and that the brakes needed attention. 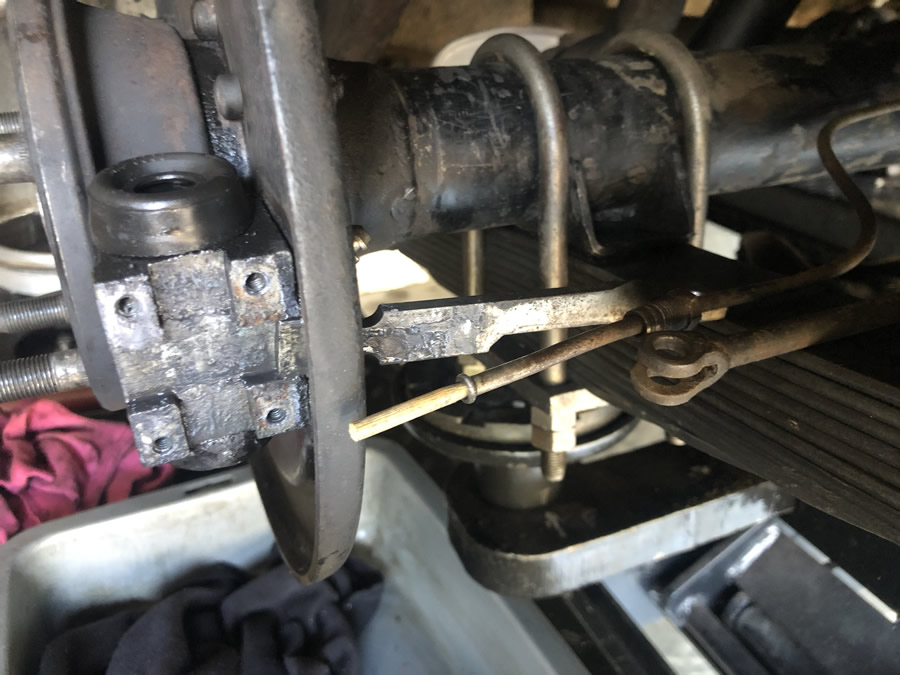 |
||
Apart from being totally greasy it is clear that the linings need replacing. This is the driver's side REAR and the astute observer will notice that the shoes have been fitted BACK TO FRONT! 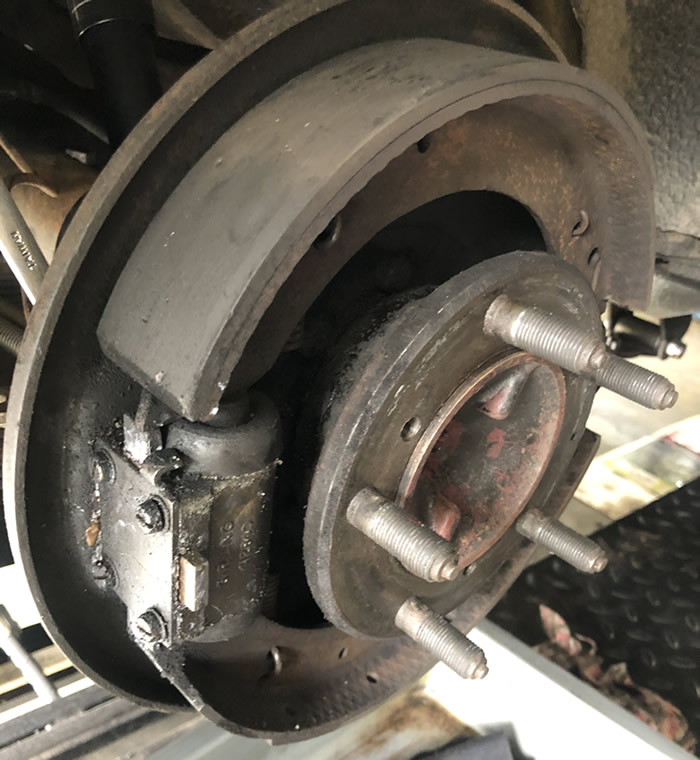 |
The handbrake cover has been removed so that I can photograph the mechanism to help me when the rebuild starts. TIP if you are restoring a car, take photographs of EVERYTHING because you will surely forget what goes where when days, months or years go by.  |
||
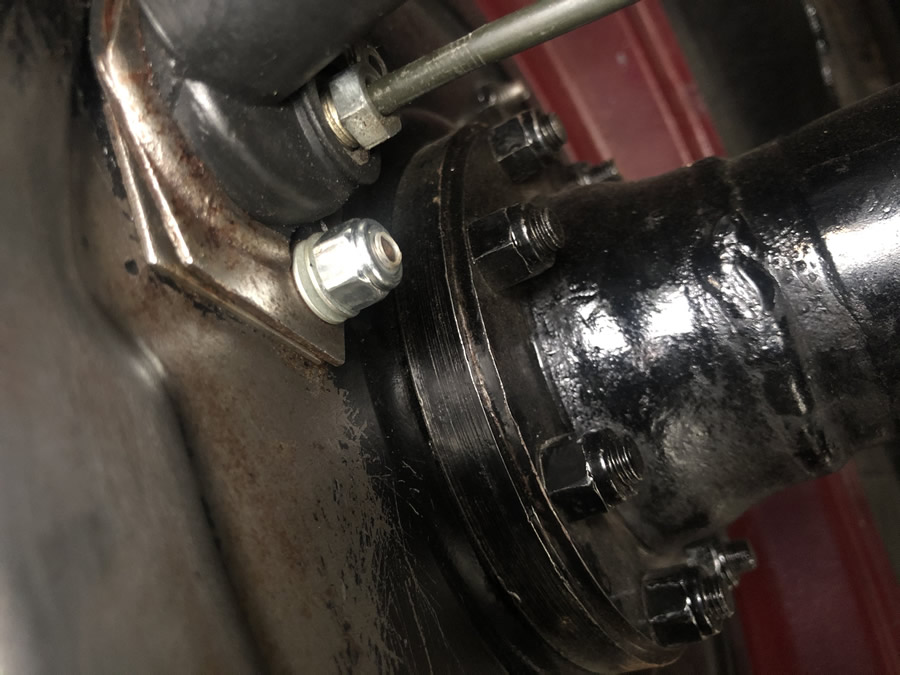
This where I will introduce you to "GODZILLA" (an unknown previous "mechanic") who managed to tighten parts way beyond common sense. Here he has managed to tear one of the studs completely out of the casting as well as cracking the casting at the bleeder which has had a helicoil repair. 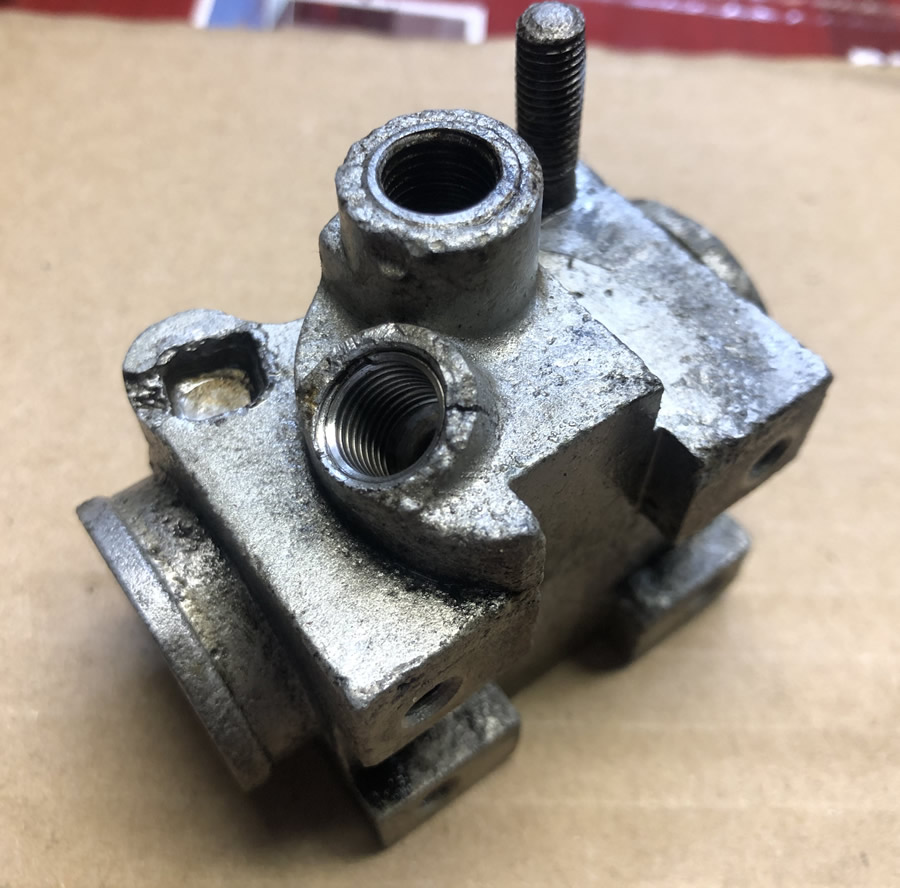 |
Part numbers are worth recording as we are blessed with spare parts suppliers in the UK and Australia, largely due to Riley clubs. In my case I was able to source 2 NEW rear wheel cylinders from the Riley Motor Club in NSW 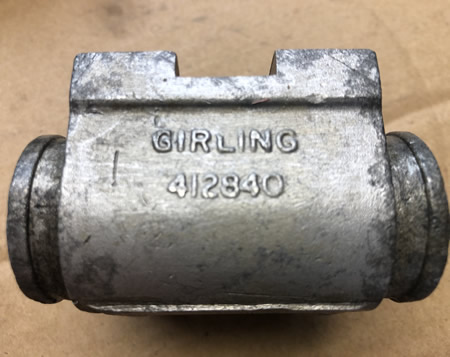 |
||
| Always, the workshop manual is indispensible when doing a rebuild/ repair. Once again GODZILLA managed apply so much force to one of the high tensile splined studs that it was broken in half! 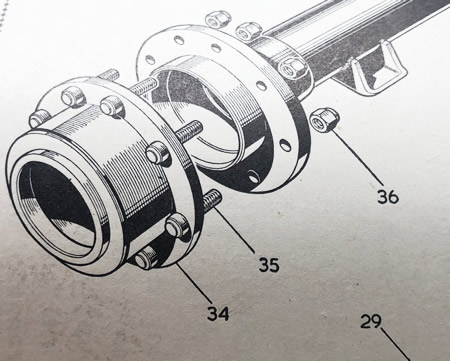 |
It may have been an easy job extracting the axle when the cars were relatively new but NOT SO after nearly 70 years. The bearings had rusted in place. This is why I always use an anti-seize product in re-assembly.  |
||
I didn't have a decent size slide hammer, so had to improvise with a bit of guidance from my very experienced Rolls Royce trained mechanic mate. 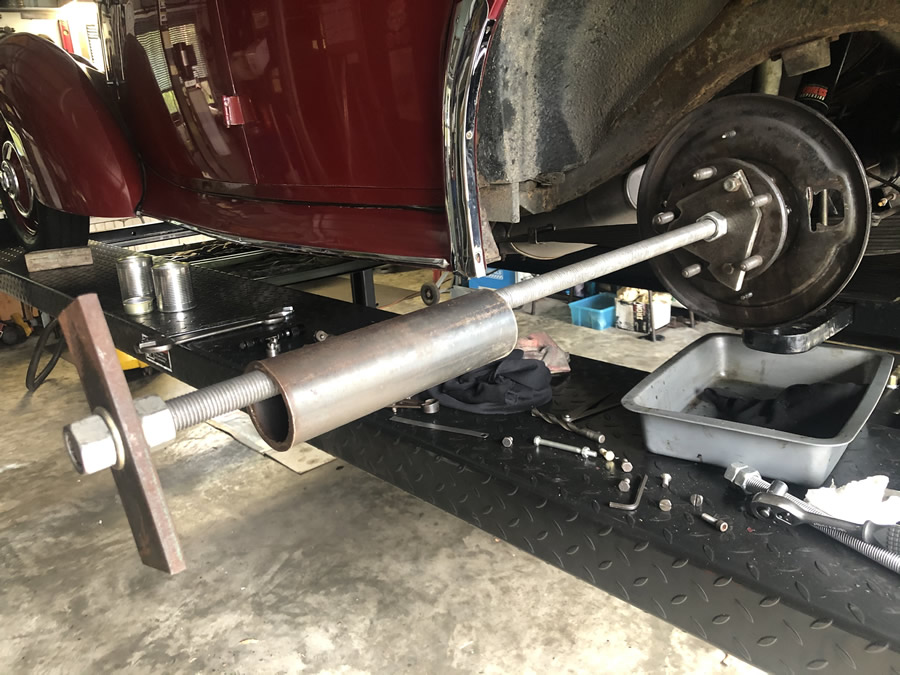 |
It's amazing how much penetrating oil I have used on this project. WD40 Specialist Automotive Penetrant has been very effective. 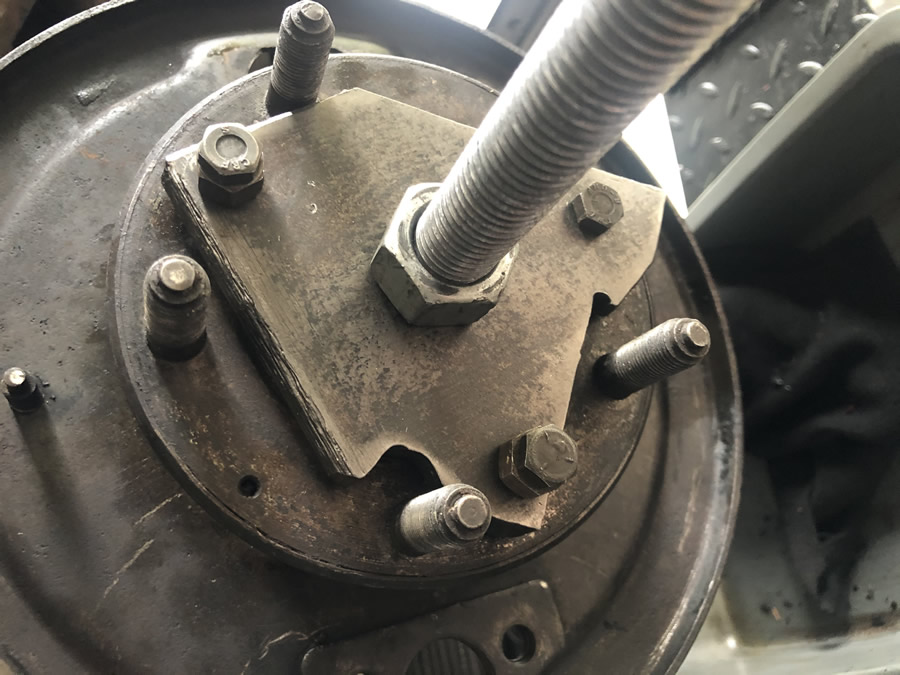 |
||
GODZILLA'S "good" work is evident. 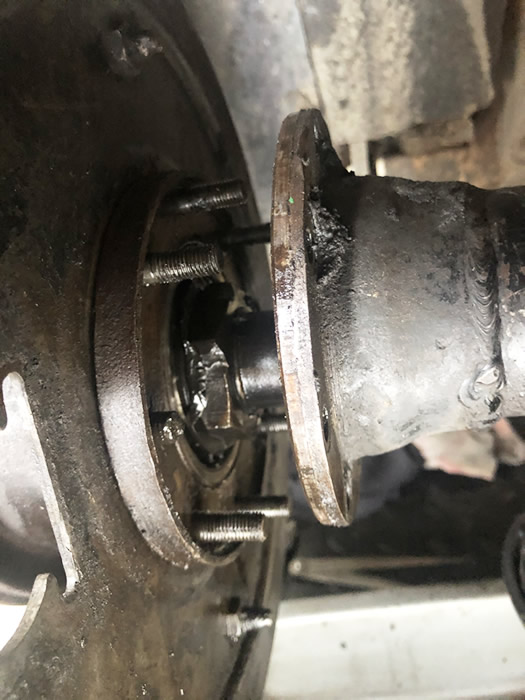 |
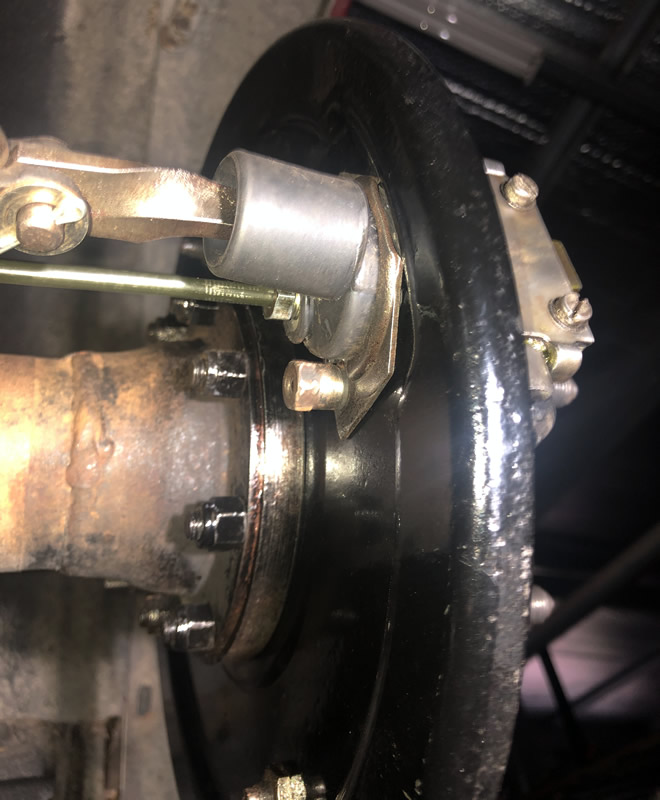
Axle bearings and seals replaced - new wheel cylinders, pistons seals etc. installed. Unfortunately I hadn't taken notice of how the dust cover plates were positioned and I didn't have a good photo (bad!!). Consequently it looked OK but later you will see that I had trouble refitting the brake shoes. 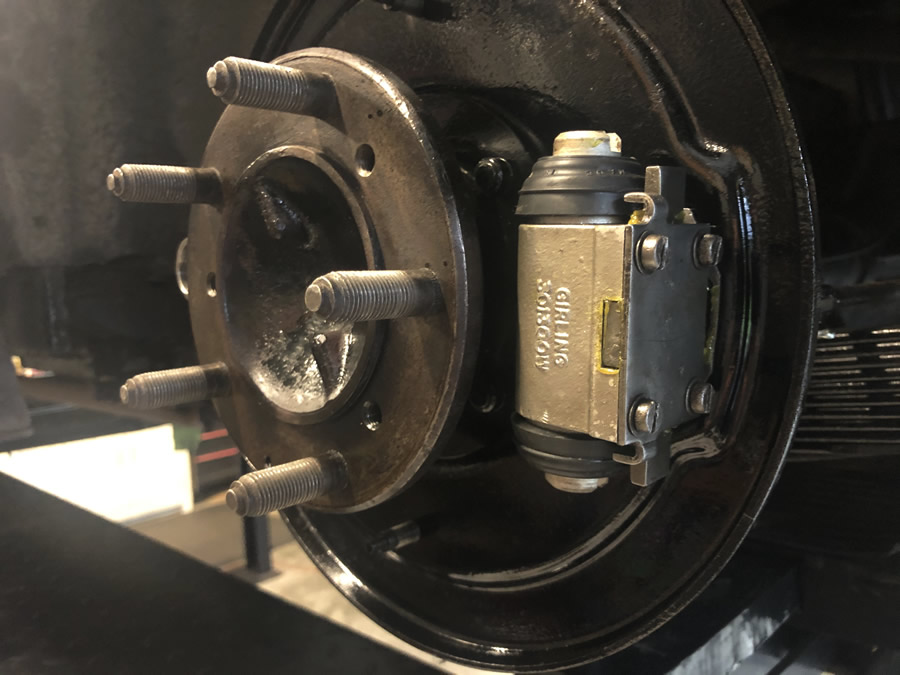 |
||
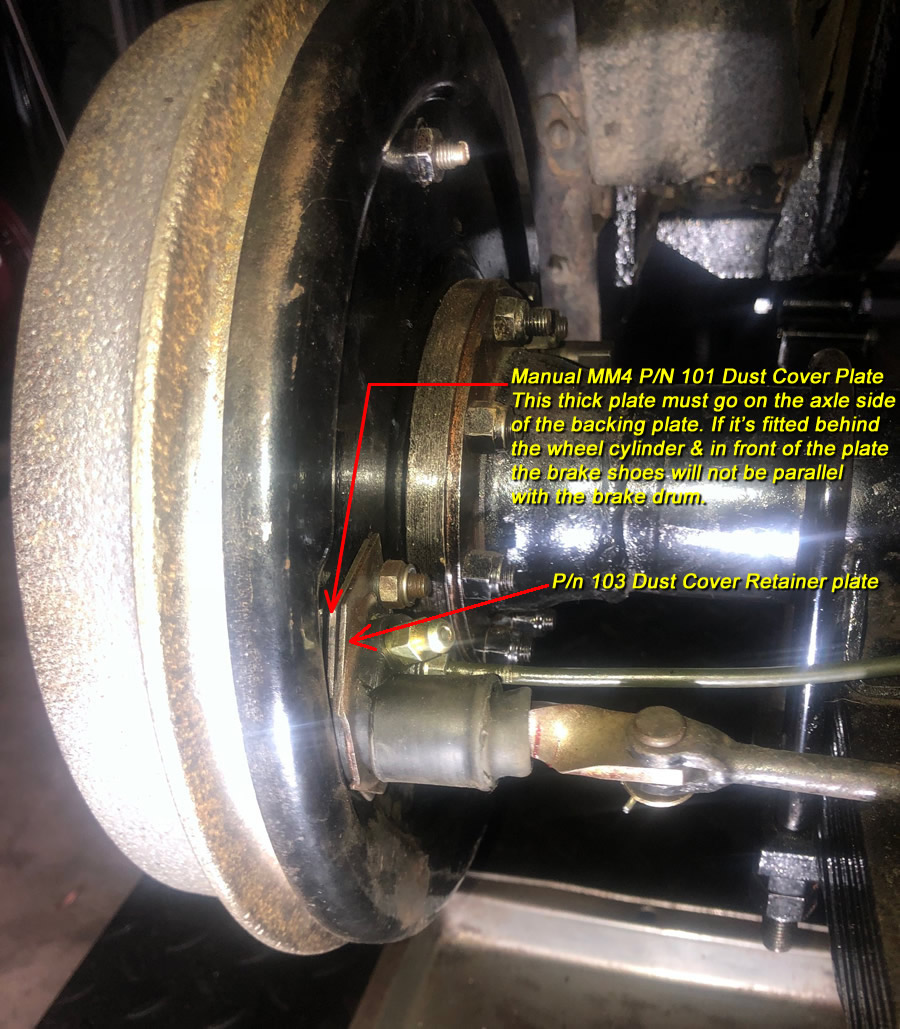
This photo reveals the mistake but the correction is obvious in the photo to the right. If the thick plate (101) is fitted in front of the backing plate it pushes the back of the rear brake shoes out of alignment. The method of checking brake shoe alignment is shown in the bottom row.
|
And, EVEN WORSE, I made a fundamental mistake in fitting the rear wheel cylinders! I stuffed up and tightened the 2 wheel cylinder
nuts. Yes ... I know, the backing plate is slotted and any idiot (except this idiot) would know that it should be fitted with thackery washers and lock nuts, set such that the cylinder is just free to move up and down. |
||
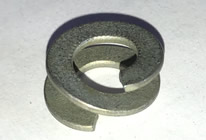
The above 2 photos show the incorrect fitting of the wheel cylinders which is missing the 1/4" Thackery Washers, shown fitted below:
|
|||
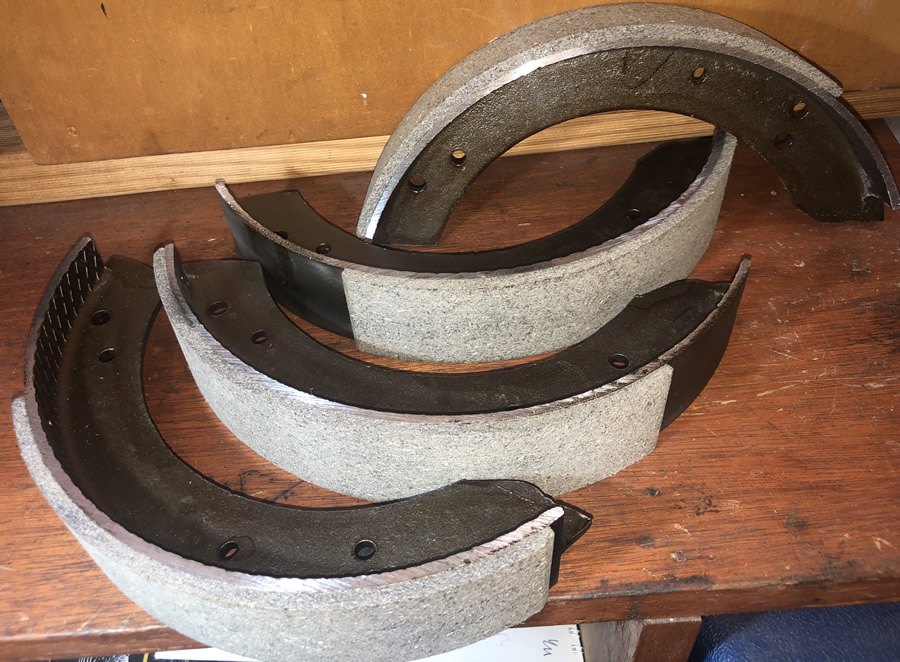
The shoes have been rejuvenated with bonded linings. |
Whilst this photo is of a front shoe it shows how the distance from the backing plate can be checked, using a caliper to check the distance between the backing plate to the front of the brake shoe in several positions.This is also how the steady post (p/n 94) can be correctly set. 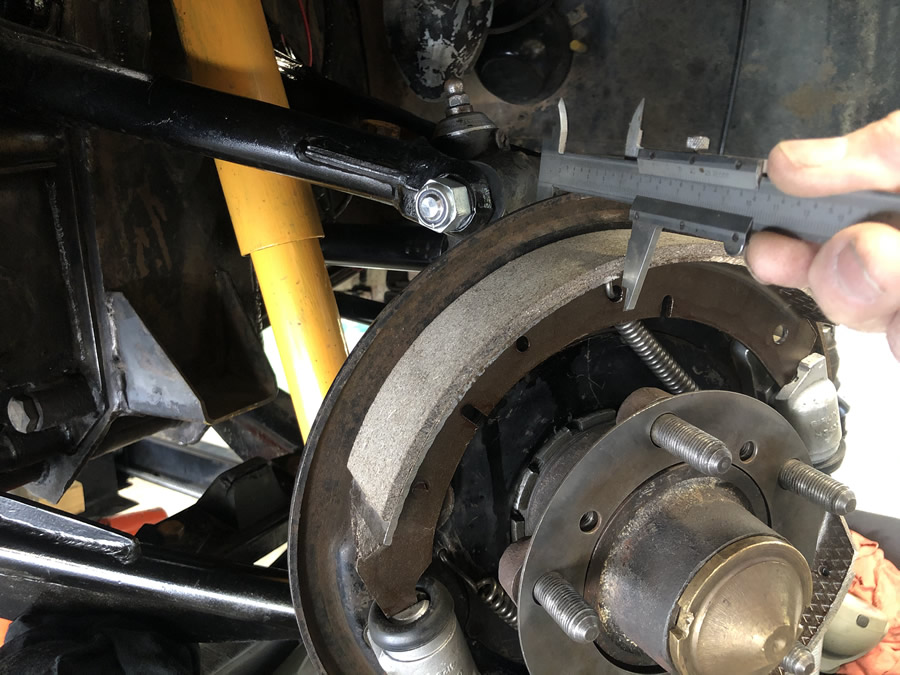 |
||